The Tailor’s Fitting Handbook — How a Master Tailor Perfects a Custom Suit
By a master tailor in Hoi An (20+ years). Practical, measurable, and proven — for travelers and professionals who want a truly perfect custom suit.
why this handbook matters
about fabric and style. That’s natural — but fabric is only the raw material. The real defining factor is fit: how the suit sits, moves, and ages with the wearer. Google values E-E-A-T: demonstrating deep, practical experience matters more than surface content. This handbook documents a professional-fitting protocol, precise checks and corrections, and troubleshooting steps that only experienced tailor Hoi An artisans use.
.jpg)
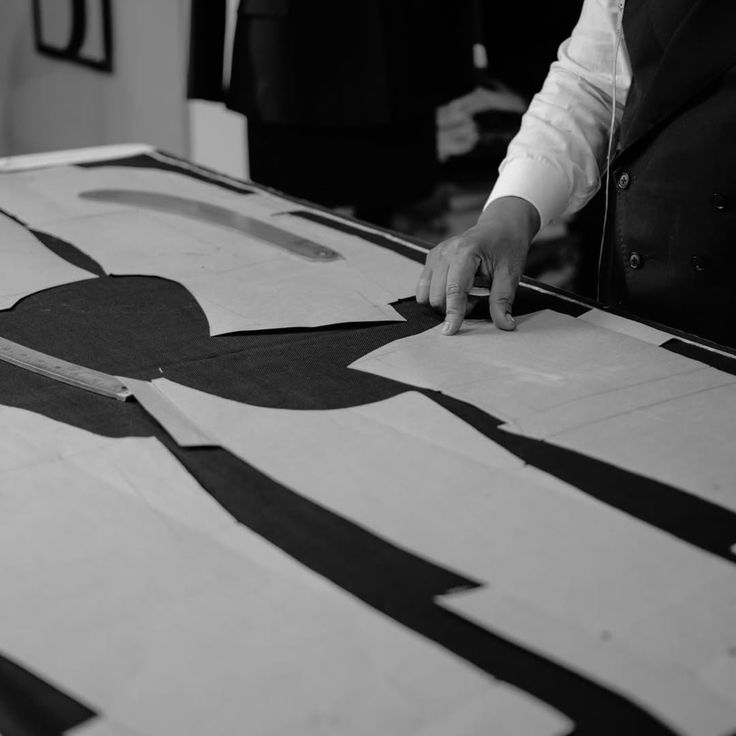
Overview: the 3-stage fitting protocol (what we do, why, and when)
The master’s fitting process is organized, measurable, and repeatable:
- Pre-fit body analysis & pattern draft — 30–60 minutes
Goal: create a pattern that anticipates posture, asymmetry, and client needs. - First fitting (basting / basted muslin or basted jacket) — check core geometry (shoulder, chest, armhole, balance). Mark major corrections.
- Second fitting (semi-finished) — refine sleeve pitch, waist suppression, collar roll, trouser rise. Make micro adjustments.
- Final fitting (finished garment) — mobility & comfort tests, asymmetry fixes, final trim.
(Professional shops like Maya Tailor compress this to 2–3 visits for 24–48h orders but never skip the core geometry checks.)
Part A — Body analysis & measurement nuance (why “taking measurements” is a beginner step)
A master tailor does body mapping not just measurement. Key elements:
- Posture mapping: note forward head, rounded shoulders, sway back, pelvic tilt. These change pattern lengths: e.g., sway back often requires more back length and different side seam shaping.
- Shoulder slope angle: measured visually and by feel; slope affects shoulder pad thickness and sleeve pitch. (Typical slope varies widely; record visually as “flat/medium/steep” for pattern drafting.)
- Scapula & back fullness: check when arms raised vs relaxed to determine back darting and shoulder blade accommodation.
- Arm hang & natural rotation (sleeve pitch): have client relax arms to side; observe natural forearm rotation — this sets sleeve orientation and pitch.
- Hip & seat geometry: measure full hip, seat, and thigh circumference for trousers; note asymmetry.
(2).jpg)
Why this matters: two people with same chest measurement can need very different pattern shapes because of posture and shoulder slope.
Part B — First fitting: core geometry checks (basted jacket or basted muslin)
Main checks (and acceptance tolerances):
- Shoulder line (seam sits on natural shoulder edge)
- Good: shoulder seam aligns with outermost point of shoulder, no divot, no overhang.
- Fail signs: overhang (fabric droops past shoulder), divot (gap before seam).
- Armhole height & comfort
- Good: high enough to allow mobility with minimal extra fabric under arms; no pulling when lifting.
- Fail signs: low armhole → side wrinkles and boxy silhouette; too high → restriction.
- Chest & buttoning balance
- Good: front closes smoothly with no diagonal pull lines; one flat wrinkle from button outward may be acceptable.
- Fail: V-shape pulling from button; gaping at button.
- Back balance (front/back length relation)
- Good: when buttoned, jacket hem sits neutrally; collar rests against nape without gap.
- Fail: hem rides up when sitting (front too short) or collar gaps (back too short).
- Collar fit
- Good: collar follows neck curve, ~2–3 mm contact gap along seam (no big gaps or digging).
- Fail: large collar gap or collar digs into neck.
-

How to mark & communicate: use tailor’s chalk and pins, and take photos from front/side/back for pattern adjustment.
Part C — Second fitting: refinement & micro corrections
.jpg)
Once core geometry is correct, we refine:
- Sleeve pitch & rotation
- Method: ask client to relax arms, lightly mark natural axis, and match sleeve seam orientation.
- Fixes: rotate sleeve block on pattern; if wrinkles appear at biceps, adjust sleeve head or pitch.
- Lapels & collar roll
- Pad-stitch density controls roll. Hand pad-stitching with higher density (6–10 spi) yields a soft, stable roll. For a softer roll, decrease density slightly.
- Fix: increase pad-stitching density or re-shape head canvas if roll is flat or sharp.
- Waist suppression & chest fullness
- Aim for a balanced V: visually 4–6 cm waist suppression on most men (varies by body type).
- Fixes: take in side seams and adjust panel shaping; do not over-suppress with cheap short darts — use full pattern shaping.
- Trouser fit (rise, seat, thigh, break)
- Rise: set so waistband sits comfortably at chosen point (natural waist / mid-waist).
- Seat: no horizontal pull lines when seated or standing.
- Break: classic break is slight crease on top of shoe; verify walking.
- Fixes: adjust crotch seam (hard), seat seams, or taper leg.
- Shoulder and armhole finalization
- If shoulder has slight divot, re-set shoulder pad and increase pad support with additional canvas padding.
- If armhole pulls, consider deeper armhole reshaping and re-set.
Part D — Final fitting: dynamic & stress tests (what masters always do)
.jpg)
Before handover, perform these movement tests:
- Sit test: sit naturally, cross legs, bend forward. Jacket should not pull across button or lift excessively.
- Reach & raise: raise arms to chest level; check underarm constraints and collar behavior.
- Walk & turn: observe natural swing and if jacket returns to shape.
- Shirt cuff symmetry: 1–1.2 cm of shirt cuff visible evenly.
- Pocket stress test: insert wallet in jacket pocket and walk; check balance & sag.
If any test reveals stress lines, mark and correct.
Part E — Common fit problems, root causes & fixes (practical troubleshooting table)
.jpg)
Many clients searching for a custom suit in Hoi An obsess
|
Problem |
Root cause(s) |
Fix (pattern/hand) |
|---|---|---|
|
Shoulder divot |
Too narrow shoulder block; insufficient pad shaping |
Widen shoulder pattern; add pad roll or re-set head canvas |
|
Collar gap |
Back length too short; shoulder slope mismatch |
Increase back length; adjust shoulder slope; reshape head canvas |
|
Gaping front / X-pulls at button |
Front balance wrong; chest shaping mismatch |
Lower/raise button stance; add/reduce chest fullness |
|
Sleeve wrinkles at biceps |
Sleeve pitch misaligned |
Rotate sleeve block; adjust sleeve head height |
|
Flared skirt / hip pulling |
Wrong center back length; hip shaping |
Rebalance front/back length; adjust side seams |
|
Pocket droop |
Poor internal pocket support |
Add internal reinforcement; reposition pocket |
|
Collar digging |
Back too long or too tight |
Shorten back or ease neck area; re-shape collar pitch |
|
Cuff asymmetry |
Arm length or posture asymmetry |
Adjust sleeve length individually; re-measure with shoulders relaxed |
Part F — Technical details only pros mention (why E-E-A-T matters)
.jpg)
- Armhole circumference & shape: high armhole (snug but comfortable) improves mobility and aesthetic. The difference of 1–1.5 cm in armhole curve can change the shoulder look drastically.
- Pad-stitch density: 6–10 stitches per inch (spi) in bespoke work; lower density = looser roll. Machine pad-stitch exists but hand pad-stitch ages and drapes better.
- Canvas layering: floating chest piece vs single layer changes chest projection. A floating chest with additional horsehair layer creates a softer chest with better movement.
- Shoulder pitch: the angle between shoulder seam and sleeve line; incorrect pitch causes sleeve twisting.
- Balance line: front-to-back length relation measured by holding jacket at button and checking hem level; imbalance indicates need for length adjustments.
Part G — Communication: what to say to your tailor
When you’re a client in Hoi An or anywhere, asking the right questions separates pros from pretenders.
- “Can you show me the internal chest piece?”
- “How many fittings do you recommend for my shape?”
- “Do you hand pad-stitch the lapel or is it machine?”
- “Can you correct the sleeve pitch if my arms rotate naturally to the left/right?”
- “What is your tolerance on shoulder seam placement?”
A true tailor Hoi An master answers technically and offers to demonstrate on the jacket.
(2).jpg)
FAQ
Q: How many fittings do I need for a perfect suit?
A: Typical master process is 2–3 fittings (basted, semi-finished, final). For 24–48h orders, experienced shops compress steps but never skip geometry checks.
Q: Can you fix a badly made suit?
A: Many structural defects (shoulder, collar, chest) can be corrected by re-setting canvas and pad-stitching, but heavily fused suits with delaminated fronts sometimes require total front replacement.
Q: How much should I expect to pay for quality fitting in Hoi An?
A: Prices vary; the value is about experience. Many travelers choose half-canvas with 2–3 fittings for best cost/performance tradeoff at reputable tailors.


